Graco Magnum 262800 X5 Stand Airless Paint Sprayer, Blue
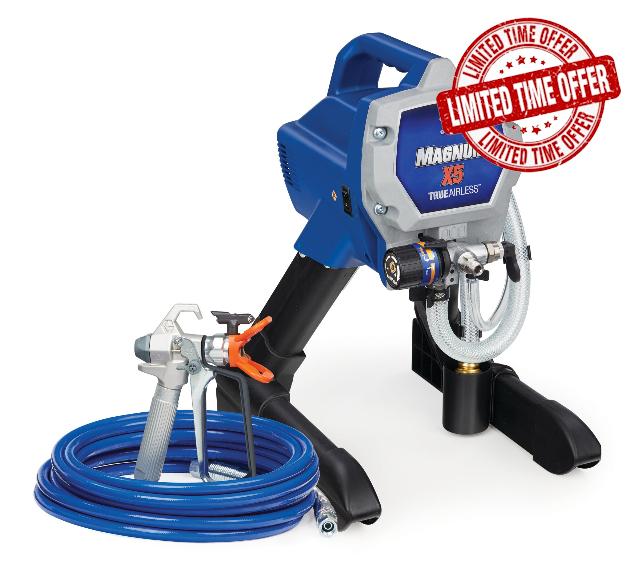
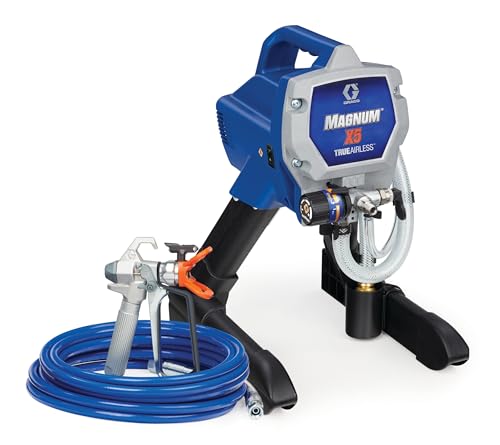
Graco Magnum 262800 X5 Stand Airless Paint Sprayer, Blue
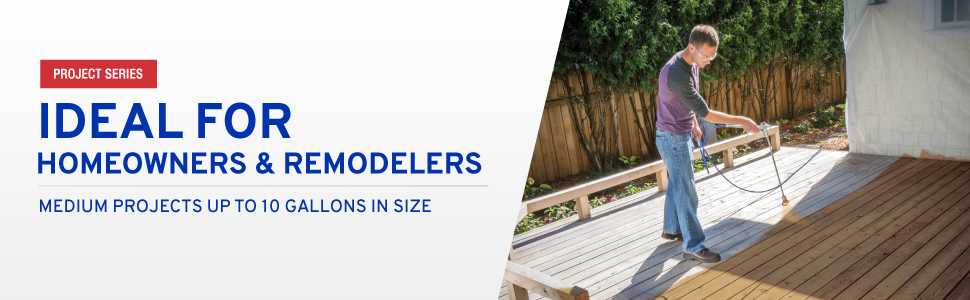
- Just right for DIY Homeowners and Remodelers looking for more power and mobility when tackling larger projects
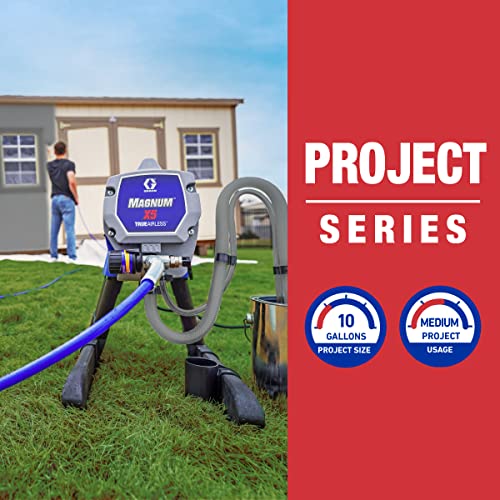
- Ideal for projects up to 10 gallons in size, allowing you tackle multiple projects every year
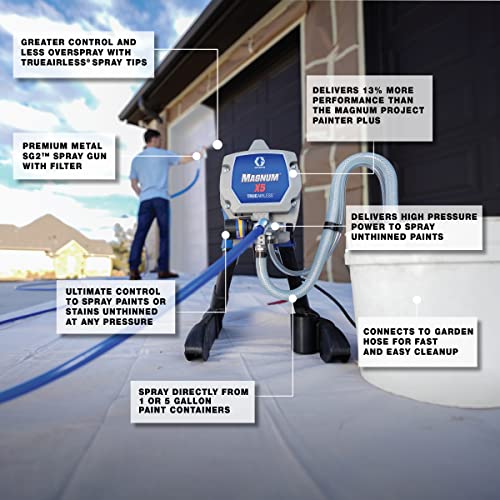
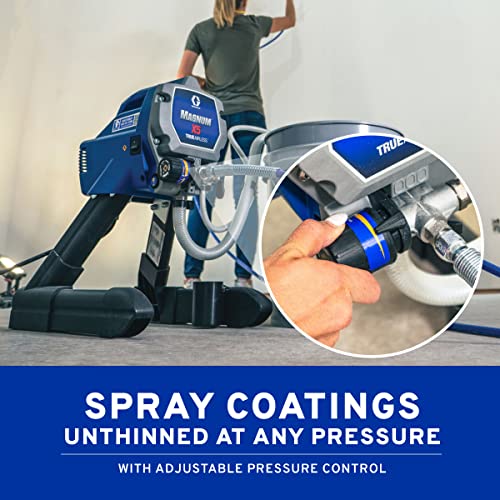
- Fully adjustable pressure control to give you ultimate control to spray paints or stains unthinned at any pressure
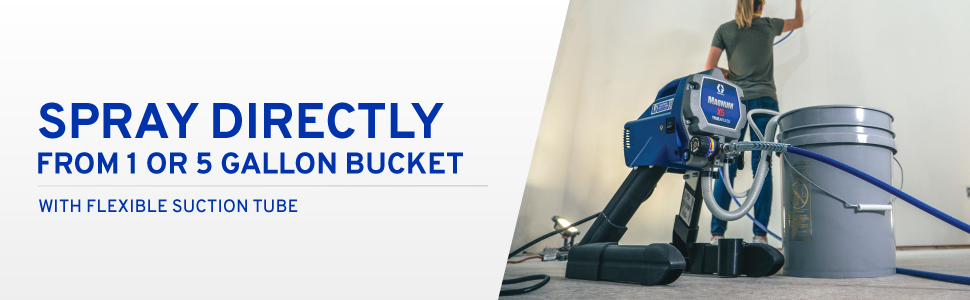
- Flexible Suction Tube allows you to spray directly from a 1 or 5-gallon paint bucket
- Supports up to 75 ft of paint hose to reach peaks or second stories without diminishing performance
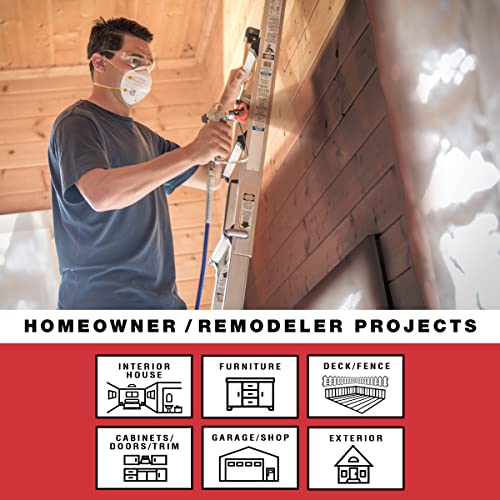
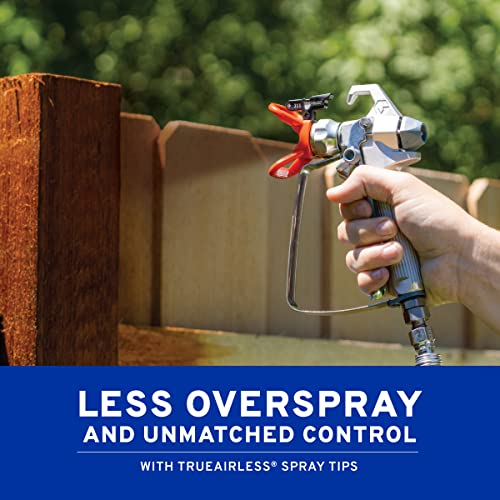
The Graco Project Series sprayers make it easy for avid DIY homeowners and handymen to power through small to midsize jobs with speed and finesse. DIY homeowners and handymen get cost-efficient, high-speed performance with the Magnum X5. These sprayers are ideal for painting all types of indoor projects, or tackle outdoor projects like decks, siding, fences or small homes. Includes SG2 Metal Spray Gun, RAC IV 515 Switch Tip, 25 ft. Duraflex paint hose, Pump Armor storage fluid, PowerFlush adapter, Quick Start-Up Guide and Operation Manual.
| SKU: | B0026SR0FW |
| Weight: | 17 Pounds |
| Dimensions: | 12.4"W x 17.9"H |
| Brand: | Graco |
| Model: | 262800 |
| Colour: | Blue |
| Manufacture: | Graco |
| Colour: | Blue |
From the manufacturer
 Magnum Project Painter Plus Magnum Project Painter Plus |  Magnum X5 Magnum X5 | 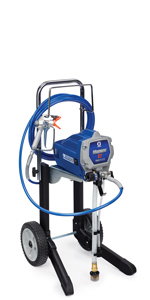 Magnum X7 Magnum X7 | 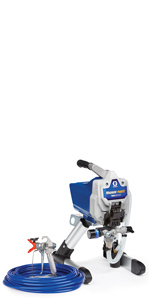 Magnum ProX17 Magnum ProX17 | 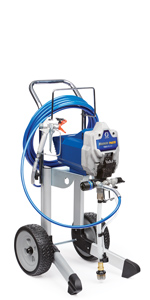 Magnum ProX19 Magnum ProX19 | |
|---|---|---|---|---|---|
| Customer Reviews | 4.5 out of 5 stars7,555 | 4.6 out of 5 stars6,820 | 4.6 out of 5 stars4,175 | 4.5 out of 5 stars428 | 4.7 out of 5 stars1,018 |
| Price | — no data | $309.99 | — no data | — no data | — no data |
| Series | DIY Series | Project Series | Project Series | PRO Series | PRO Series |
| Project Size | 5 Gallons | 10 Gallons | 15 Gallons | 20 Gallons | 30 Gallons |
| Project Usage | Light | Medium | Medium | Heavy | Heavy |
| Performance Rating (gallons per minute) | 0.24 GPM | 0.27 GPM | 0.31 GPM | 0.34 GPM | 0.38 GPM |
| Supported TrueAirless Spray Tips | 10 Spray Tips | 10 Spray Tips | 12 Spray Tips | 12 Spray Tips | 12 Spray Tips |
| Support DuraFlex Hose Length | 50 ft. Max Hose | 75 ft. Max Hose | 100 ft. Max Hose | 150 ft. Max Hose | 150 ft. Max Hose |
| Spray Gun | SG2 Spray Gun | SG2 Spray Gun | SG2 Spray Gun | SG3 Spray Gun with Hose Swivle | SG3 Spray Gun with Hose Swivle |
| Maximum Pressure | 2800 psi | 3000 psi | 3000 psi | 3000 psi | 3000 psi |
| Maximum Tip Size | 0.015 | 0.015 | 0.017 | 0.017 | 0.019 |
| Sprayer Weight | 10 lbs. | 13 lbs. | 23 lbs. | 27 lbs. | 38 lbs. |

Great sprayer, worth the money for big projects
This sprayer worked out well, it was easy to setup and operate. The quality of the spray gun is top-notch, this sprayer was spraying thick house paint with no problems and no thinning. Highly recommend this sprayer for anyone who has a good size project to paint. Clean up is a little tedious, but take your time and do it right and it will last a while.
Worked just fine on first use. I used both the included 515 tip and a 211 for trim work and both sprayed what is considered very thick SW Duration and Glidden Premium exterior acrylics strong and even at about 4/5th on the pressure dial (I.e. still had room to push a little more paint if I wanted to).
The hose adapter for clean out is nice to have however it doesn’t eliminate the need to disassemble and clean the handle and hoses seperately. There is a filter in the handle that even after several minutes running on the hose adapter was still caked with paint. Ditto the spray hose. Just clean everything separated the old fashioned way (it is easy to disassemble).
ahorrate... un dolor de espalda
la haba visto antes pero se me hacia muy cara y despues de pintar un cuarto de 30m2 (sellador + pintura) y de sufrir un tremendo dolor de espalda por varios dias, decid invertir y comprarla.
la semana siguiente pint una pared de 15mX2.5m y puedo decir que me tard mas en preparar la mquina y la pintura que en pintar, si vale la pena.
pros:
– ahorra tiempo y esfuerzo pintando.
– no necesitas diluir la pintura y por ende necesitas aplicar menos manos.
– pinta continuo todo una cubeta de pintura sin tener que estar rellenando vasitos, solo pones la manguera en la cubeta, preparas la mquina y listo, hasta que se acabe la pintura.
– mquina de calidad.
– si se atasca la pistola solo le das la vuelta a la boquilla, apriestas el gatillo para limpiarla, le vuelves a dar la vuelta a la boquilla y sigues pintando normal.
cons:
– es cara
– necesitas ventilacion (si vas a pintar en un cuarto cerrado USA MASCARILLA)
– necesitas encintar lo que no quieres que se pinte por que avienta mucha pintura
– la mquina tiene su curva de aprendizaje.
– solo es recomendada para pinturas a base de agua.
si piensas pintar toda una casa o cuartos muy grandes, si te la recomiendo, te vas a “ahorrar” en dolores de espalda y tiempo.
Love this thing! I did watch YT videos as well as Gracos videos. Had to clean out several times bec I didn’t want to clog the machine. I used 3M masker with tips form painters online to mask off door and trim. Even as a newbie I got a fantastic finish.
Recommend for new users-
Watch videos. Take the time to learn aspects of the machines. Settings. Tips and pressure needs. It doesn’t take long but is well worth it. Expect to use more paint than is normal. Sometimes a lot more if u dotn setup the machine correctly
Pay attention to temps before u plan to paint Takes longer to cure and your specialty paint may need a range to be applied best
Also use really good lighting. With the finish this gives u really need well lit area. Older eyes especially. I only painted during daylight hours and above 50 degrees ambient temp
Buy 2-
5 gallon pails with lids and devote them exclusively to paint jobs. Wash each out well after using.
Have hose ready with control valve or u will be walking back and forth too much.
I got the extension wand but really didn’t need it for jobs so far.
Prep, prep, prep WELL. No sprayer will help u if u don’t prep whatever u r painting well. I will post pics later but am working on metal exterior doors right now and I spent a LOT of time prepping. But the end result was worth it. Go to sherwin Williams or Benjamin Moore or a specialty store who knows paint! Dont use cheap stuff. Use good primer and paint. It makes a difference. And make sure To use proper primer. Store can help. Big box stores r convenient but they usually don’t have all the expertise u need
Be prepared for mistakes and messes at first.
Use drop cloths on concrete or where u don’t want to have paint should it spill
But cheap plastic drop cloths and use on walls around your painting. Prevents overspray from clinging in the air and then onto surrounding areas.
Consider using a masker. 3M 3000 is well known and very very easy to use when u learn. I just watched YT videos and bought masking tape, Brown paper, paper blade or plastic blade. Practice. It’s EASY!
If u have compressor use air gun to air off dust or use a dusting brush just before u paint. That fine dust will mar ur beautiful finish if not
Get some help if u r short or not real strong. Moving ladders and buckets can be helpful with friend.
Use paint strainer bags. They r pretty cheap and will keep u from clogging your tips
If u leave your gun for a few min and then it won’t spray ur strainer is likely plugged. Uncouple the gun break it down (easy peasy) and wash throughly before trying again. It’s not worth the aggravation. After it happened to me I was careful with wash thru
Do washing outside. Who cares if some paint on grass better than inside your house
Suggest u get big spring clamps -CHEAP- at big lots or WM or any big store for cheap cheap and use them to hold lines to side of buckets. The suction and discharge lines from machine r rather inflexible and can pull bucket over or pop out of bucket. Use 2 on each but don’t crimp hose.
I put the whole deal on a table and it made it much easier.
Use light coats. Much better than glopping it on. 2-3 coats works great great great!
Watch YT videos on methods of application. Doors should be vertically up and down motion but other items are different. It does make a difference and practice with some plain old cheap latex paint first. U can spray on cardboard or ground. But u need to see the pattern and ensure that the paint is not ‘tailing’. Easy to adjust and easy to fix
Buy extra tips as u go along. There r differences. If u r just using general purpose walls in ur home or priming things the tip that comes with it is fine and easy to use. But if u need a fine finish like for doors or cabinets try a FFLP FINE FINISH LOW PRESSURE. I have been using a 315FFLP and it has given me truly incredible results Very proud of it Tip. Watch for the width of tip. Learn what the numbers mean and it’s easy easy. These tips r the latest and newest and allow u to use about half the pressure normal spraying would need They also produce an incredibly fine finish which looks utterly fantastic.
Wear PPE. ESP respirator with cartridges. U dont want to breathe in paint over and over, and this machine atomizes so well that it will float in the air
Wear clothing u r willing to throw away. And keep wearing it until u r done.
Be prepared for actually WANTING to do painting. can u believe it!
Lastly. Don’t expect to be painting the first day. Practice yes but not painting. Prep is far too long to be able to get all done. When I was about to do 5 exterior metal doors I spent majority of time using airplane remover to get the main paint off. It is the best for removing large searches instead of sanding etc. use respirator.
That took more a day. Then I had to sand all the remaining and then use Bondo to fix dents and holes etc. sanded that and re did the bondo again. I used TSP and washed each door throughly off. Extra water for removal of all residue. Waited for them to dry and after drying, I took all the weather strips out of jamb and masked it per videos from YT. I primed four exterior doors at once. Made it much easier for cleanup. Sanded lightly and re primed with second coat. Sanded and then went for the gusto. I am about to paint them all at once. Gotta tell ya the painting is the FUN part. It’s takes literally seconds to do a door with this thing. SECONDS ! Will update later with some photos of some projects.
I’M VERY IMPRESSED WITH THIS SPRAYER. I’ve been using them for years and they were always heavy and temperamental, but this it’s very, very lightweight, very powerful, and if you do not screed, your paint, you will be stopping a lot.Because this thing is a monster. It is good value for the money to what I paid for that seems to be very durable. No leakage noise level is a little normal and cleaning performance. It’s easy, it is very durable. I will say that I love it compared to the older models.And i’ve used
Se pinta rapidisimo
Es una chulada, pintas una habitacin en 10 min. Empapelas en 1.5 hrs, lavas la mquina en 1 hrs,, minimo debes de usar unos 8 litros de pintura para que valga la pena la lavada y la empapelada. Casi casi un da empapelas,, al otro da pintas en 20 min. Se aplica de forma muy uniforme la pintura, ,, con la brocha quedan marcas, quedan pelos de la.brocha. con esta cosa queda el acabado perfecto, si la recomiendo mucho, vale la pena. Lo nico que no eh usado es ese liquido azul que segn es para que no se congel.
I just painted my 2300 square foot house with this sprayer. I sprayed about 22 gallons of paint and it came out great. I did not have a single clog and I never stirred or strained the four 5 gallon buckets of paint I used. The paint I used was freshly mixed valspar from lowes. I took about two months to paint the entire house. I basically did one side of the house at a time. I power-washed, scraped, sanded, caulked and taped the windows doors and trim on each side of the house before spraying (not to mention cutting back bushes etc). Prep, Prep, Prep. Prep is the hardest part about painting. The spraying was the easy part. I was able to leave it covered overnight without cleaning it and it sprayed just fine the next morning. In between sections of the house I just cleaned it while I prepped the next section of the house. The sprayer sat with just water in it for a couple of weeks at a time without putting pump armour in it.
Consider buying one or two extension poles with adjustable angle spray nozzles. I bought a 3 footer and a 6 footer. I used the 6 footer 75% percent of the time and was great for getting under the eaves. The 3 foot extension was great for ground level painting. Using the 3 footer is easier than painting close up with just the sprayer. The best thing to do is to go around your house and and go through the motions of actually painting it and you will get a good idea of how long an extension pole you may need. If you are not using an extension, and even if you are, please get some eye protection and a face mask. The closer you are to that spray nozzle the more paint is going to get in your eyes and lungs.
I’m one of those guys who likes to be prepared so I bought the extra bottle of pump armour. Don’t do what I did. You only need 2 ounces to store the machine. The bottle that comes with the machine has an 8 ounce bottle, so unless you are going to be repeatedly storing the sprayer you don’t need the extra bottle. Expect to waste a little paint. And don’t forget to consider the paint that will be in the machine and the hose when deciding how much paint you will need. Also consider that you will need 2-3 inches of paint in the bottom of the can to maintain suction.
I painted my 2 story cedar clapboard house with a 4″ roller about 5 years ago. If you have ever done this sort of thing before, you know that it takes a certain amount of physical effort to get a full coat of paint up into the horizontal corners of each clapboard. My back, painting arm, and shoulder were very sore by the time that I was done so I vowed to find an easier way.
I considered a Wagner cup sprayer but the Amazon reviews were average to very poor. I considered a Graco cup sprayer which had much better reviews. I actually checked one out in person at a big box store but it was relatively heavy even when it was not filled with paint. I did not want to trade a sore arm with a brush for a sore arm with a cup sprayer.
The Graco X5 is an entry level airless sprayer that produces the results of a higher end sprayer. A few observations for other novice painters:
GENERAL OBSERVATIONS:
1. The sprayer is very well made and durable despite its light weight. I imagine that a full cup sprayer probably would have weighed 5 or 6 pounds. The X5 spray gun probably weighs a half pound or less.
2. DO NOT SKIP THE OWNERS MANUAL. You will need to invest some time in learning how to operate this machine. The manual is very easy to understand and it goes through each step with helpful illustrations. The DVD is even more useful. I watched the DVD with the equipment spread out in the front of me on the living room floor.
3. Set-up takes a lot longer than brush or roller painting. As long as your surface is clean, you can start painting with a brush or a roller right away. Sprayers require you to cover any and everything that you do not want to get overspray on. I actually bought a very lightweight aluminum shield (36″) at a big box store for less than $18. This was very helpful. I recommend getting the smaller version as well. The large one was too big to fit the corners of smaller windows. This can save you set-up time if you do not mind razoring off any small amounts of overspray once it dries.
4. Once you are properly set-up, the actual spraying goes VERY QUICKLY! I painted a 12′ x 20′ shed in less than 30 minutes. I did what I think is a very good job even though I never used a sprayer before in my life. Given how rough and “thirsty” the siding was, I believe that it would have taken an entire day with a brush or roller.
5. You will use more paint than you are used to. I suspect that expert users can minimize paint loss more easily than I can but I feel like I used 50% more paint than I was expecting.
6. The online picture does not look like it but this sprayer will accept the more cost effective 5 gallon buckets of paint. This prevents you from having to frequently change smaller cans and it prevents paint loss from leaving all the smidges of unused paint behind. (I saved the cans for touch-up jobs that can be handled with a quick brush.)
7. Since I was painting outside, I placed both the sprayer and the paint can on a 2′ x 4′ piece of plywood. This provided a more stable platform for the sprayer and minimized chances of the can getting kicked, falling over, etc.
PROS:
1. Great value for the money from a respected name in the industry. I paid $280 for this unit with free shipping and obviously no taxes. I saw the same unit at a big box store for $299.
2. Sturdy and durable with easy to understand features. Will withstand all respectful wear and tear.
3. Paint gun is extremely lightweight and easy to use. This said, it is made completely from metal so it is very, very durable.
4. Produces great results with minimal effort.
5. Like all sprayers, it does a great job of reaching areas that are not readily accessible with brushes or rollers. Gutters were an absolute SNAP with superior results to boot!
6. If you are using a heavy paint like exterior latex then make sure that you water down the paint. If it is too thick then the sprayer will not be able to draw the paint and it will lose suction. A LITTLE WATER GOES A LONG WAY. Add a few ounces to a gallon of paint to begin with. That worked for me. It is easy to learn as you go but always start with less water than you think you need and work your way up.
CONS:
1. Sprayer loses suction when you draw down to about 2″ of paint remaining in the can. I have to wonder out loud if a stronger motor would have been able to draw down further prior to losing suction. I got around this by moving on to the next can and then pouring the balance of the previous can into the can currently in use (once there was enough room). Keep this in mind if your job hovers around needing a full gallon. You will need to manage your paint supply in order to ensure that you will be able to draw adequate suction until your job is done. (So maybe you could buy an extra quart or a full gallon can if you think that you will be able to use it in the future.)
2. As with any sprayer, set-up and clean-up take longer than brush, roller, or cup sprayer. Even so, I still saved days in completing my house and saved physical wear and tear on my body as well.
3. The sprayer is light and easy to move around. Even so, I think that I might have appreciated a higher end Graco with wheels. Not a big concern but something to consider if you are thinking about spending a little extra.
All in all, this is one of the best purchases that I have made in a while. I am pleased and proud to give this tool 5 stars. Please let me know if you have any questions.
Beautiful and Fast Results!!!
First time buying and using a spray gun system that is over $400! But the result is definitely worth every penny! I’ve tried a few of those air sprayer that cost around $50-$70, but preping process just took too long since you have to thin out the paint, and you can’t even put a quart of paint in the canister and the ending result wasn’t satisfactory! But this baby is the king!! Beautiful smooth finish!! I used eggshell paint for my basement and after the paint dries off you can’t even see any streaks, and the best part is the time that it saved me!! Only took me about 2hrs to finish the paint job that would normally takes me about a day to finish!
I have an old house with low basement joists since the basement was never supposed to be a living space, so a drop ceiling wasn’t an option unless I wanted to walk hunched over all the time. I called a couple of pros for estimates and they wanted $2K-$3k for just the joists. Then offered to do all the new walls for another $2K. I am not paying that kind of money for an interior paint job I could do myself.
After watching some youtube videos I found they had a common theme, black dryfall paint and a Graco sprayer. I know what you are thinking, “you just said you had low basement joists and dryfall paint needs 10′ to work correctly”. You are correct BUT I wanted it because it looked like a good black and I didn’t need to prime any wood to use it. Not only that but stuff isn’t expensive compared to paints and primers.
I did some comparisons of the different Graco models and I decided on the X5. I could have gone to a lower model but with what this was potential saving me I felt comfortable spending a little more for the X5. I also ordered most the other supplies including a respirator and a couple disposable painting suits from Amazon and had everything in time for a Saturday morning of fun. Menards actually had 5 gallon buckets of dryfall at the store so I bought that local.
Paints sprayers are fast but it takes a lot of time to prep your paint space. After much cleaning and prepping I got to work with the Graco. I read the manual front to back but really you just need to follow the laminated quick guide. The sprayer is pretty simple to use, prime it up, take some test sprays to get your pressure just right, and then start painting. The first coat took me probably around 6 hours to get it all applied. The next day I looked and I was a little dismayed. The wood soaked in the paint differently all over the place and I either missed some spots or did a light coat in some places. It was difficult painting because my mask and work light would get coated in over-spray and they would have to be cleaned about every 3rd joist. You have to use more paint than if you were to brush or roll, however the actual time of spraying is a fraction of the time you would be rolling or brushing. On Sunday I did a second coat which went much faster. Now I had a rhythm and some experience so it went quicker. Not only that but I didn’t have to apply it as thick as before.
The next day I went down and uncovered all the lights to see my handy work. I can honestly say, I don’t think the pros could have done much better than what the Graco did. The second coat evened everything out and the coverage was great. The wood, romex, PVC, and duct work all looked good. The pros would have done the duct work and PVC a bit better than me but you really have to look close to see the spots where it was too thick. Everyone that has seen it can’t believe I did it myself because of how great it turned out. Not sure if that is a compliment to the Graco or an insult to me.
Since the ceiling turned out so well, I decided to try my luck with the walls. I had to do a bunch of prep work to cover the ceiling but it turns out it was all worth it. Since this was all on new drywall, I primed the entire area. Rolling the area would have been a few hours but with the Graco I did the entire space in about 40 minutes. Once you get your rhythm down it goes extremely quick. To be honest, I was a little disappointed when I ran out of wall to paint. The result was smooth and even walls. I know I wouldn’t have gotten the same result if I would have rolled those walls. It turned out really well. When I did apply the paint I only did one coat since everything was applied so smooth and evenly.
Cleaning the Graco isn’t fun. I saved the dry fall buckets and then ran water through the system and into those buckets which then went to the hazardous waste recycling center. The latex paint was easier to clean and dispose of since I was able to let those buckets dry out. I then ran the Graco pump armor through it and it is now waiting on the shelf for the next project.
The Graco, suppplies, and paint ended up costing around $1K for what they wanted to charge me $5K for. I have some diehard DIY people in my family (they did my framing and drywall) and they all said the same thing after seeing my painting, “Hey, can I borrow that paint sprayer for my next project?”
If you have a large painting project, this thing is a must.