RadiantGUARD® Radiant Barrier Xtreme Attic Insulation 542
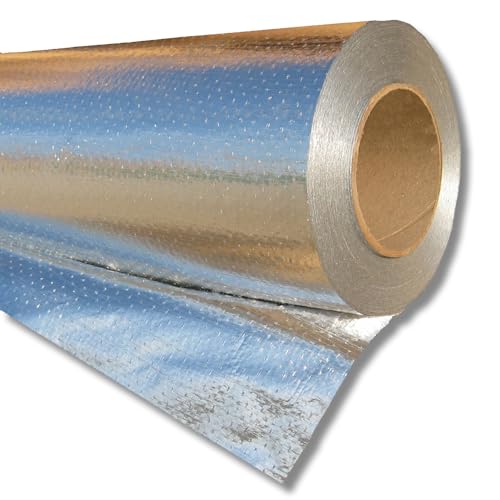
RadiantGUARD® Radiant Barrier Xtreme Attic Insulation 542 sq ft, 26in x 250f
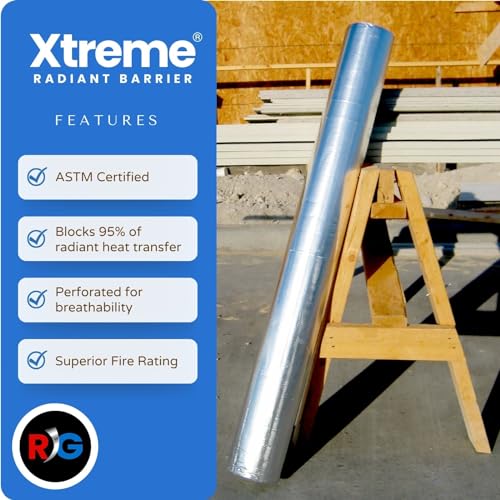
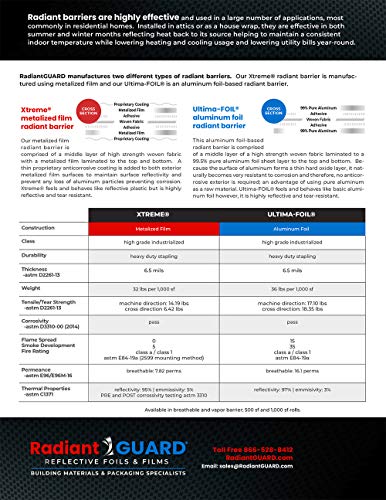
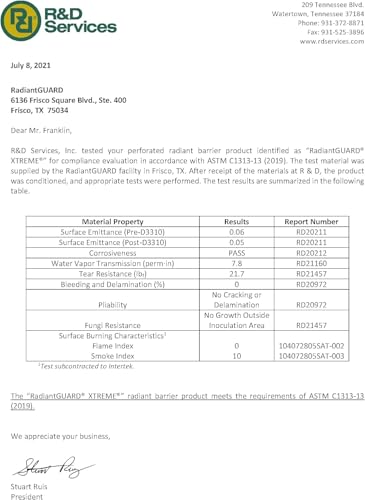
- #1 Reason to Choose RadiantGUARD Xtreme – VERIFIED QUALITY – Meets & Exceeds ASTM C1313 Radiant Barrier Certification by passing all internationally required compliance testing including surface emittance, water vapor transmission, surface burning characteristics, corrosivity, tear resistance, and adhesive performance resulting in a superior Class A / Class 1 fire rated building product that satisfies local, state and federal building codes. Summary certification shown in product photos.
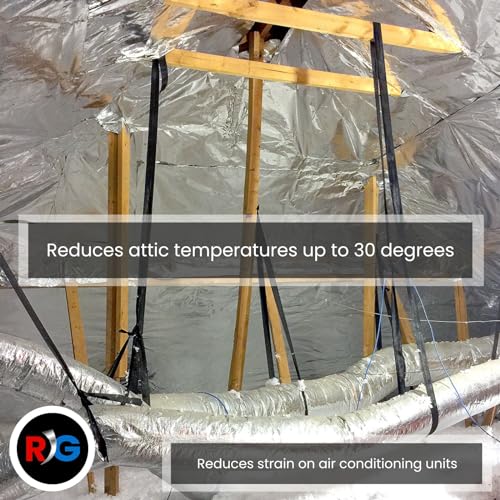
- Drop attic temps by 30 degrees and lower utility bills year round. Commercial grade (2-3X heavier than some competitors) highly reflective radiant barrier attic foil BLOCKs 95% of radiant heat gain and loss keeping home temps consistent.
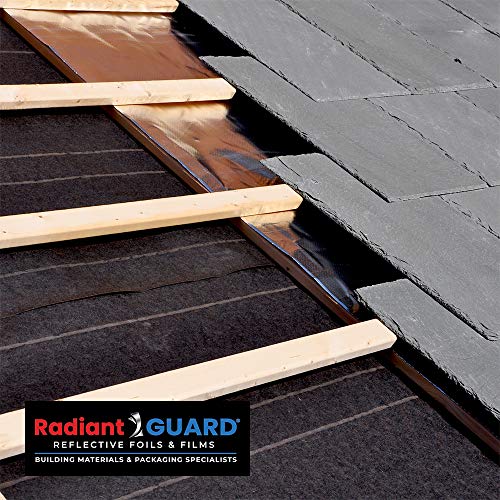
- DIY install by stapling to the underside of attic roof rafters with staple gun. Don't forget to also install on all vertical exterior walls in attic (gable walls) to get complete coverage between indoor attic area and outdoors.
- Industrialized strength perforated radiant barrier attic insulation is tear and puncture proof. Entire roll cuts easily with utility scissors or hack saw.
- Non-toxic, non-carcinogenic, fiber free and maintenance free and DOES NOT REQUIRE any special clothing or breathing masks to install unlike spray foam and reflective radiant barrier paint.
REFLECTIVE ATTIC INSULATION
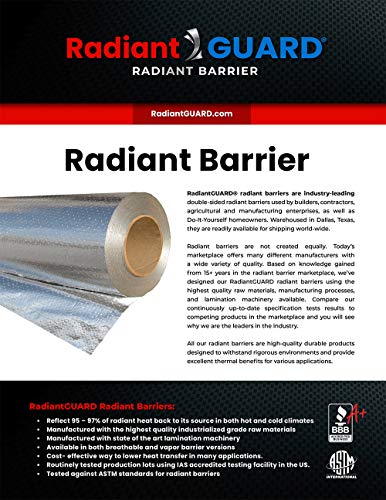
RadiantGUARD radiant barriers can be used in many applications to control the transfer of heat. It's most commonly installed in the attic space to block the transfer of summer heat gain into the living spaces below the attic but is also installed in crawl spaces, flooring, as house wraps and in many other applications. By lowering the amount of heat that enters and exits a home, the home is more comfortable and heating and air conditioning units runs less often resulting in lower monthly utility bills.
HOW RADIANT BARRIER WORKS
TRADITIONAL INSULATION VS. RADIANT BARRIER
Traditional insulations like blown-in cellulose or fiberglass batt insulations only absorb and slow down the movement of heat. RadiantGUARD Xtreme reflects 95% of the radiant heat away. Using two common properties of aluminum, HIGH reflectivity and LOW emmissivity, RadiantGUARD radiant barriers are much more effective at blocking radiant heat.
REFLECTIVITY & EMISSIVITY & AIR SPACES
When an air space exists between our Xtreme radiant barrier and a heat source, it will REFLECT 95% of the heat back towards the heat source. When an air space exists on the opposite side of the Xtreme from the heat source, it will EMIT (release) ONLY 5% of the heat from its surface. Therefore, as long as the Xtreme radiant barrier is installed with an air space on at least one side, it will BLOCK 95% of the radiant heat from passing through it making it FAR SUPERIOR than another other insulation product at managing radiant heat.
Thermal Image Comparisons Before – After – And Next to Radiant Paint
SEEING IS BELIEVING
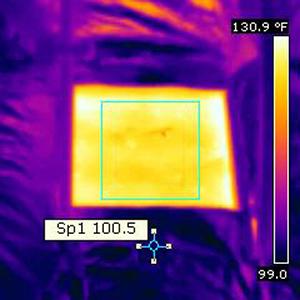
The best way to show the benefits of RadiantGUARD stapled to the underside of a roof is to compare the actual temperature of the surface of the radiant barrier with the temperature of a section of the roof decking without the radiant barrier.
This image above was taken on a 90 degree sunny day with a standard 35mm camera. It shows the underside of a roof covered with RadiantGUARD and a 20-inch by 20-inch cutout exposing the bare roof decking material above it.
The next image to the right shows the surface temperature readings.
30 DEGREE TEMPERATURE DIFFERENCE
In this image taken with a FLIR i7 infrared camera, you can see the various surface temperature readings. The temperature readings of the RadiantGUARD (purple area) average approximately 100 degrees. The temperature readings of the exposed roof decking (yellow-orange area) average approximately 130 degrees – 30 degrees hotter than the surface of the RadiantGUARD.
As seen in this example, the RadiantGUARD radiant barrier is 30 degrees COOLER than the section of the roof without the radiant barrier. This significant reduction in heat in the attic space gives you a much more comfortable home with less use of air conditioning in summer months.
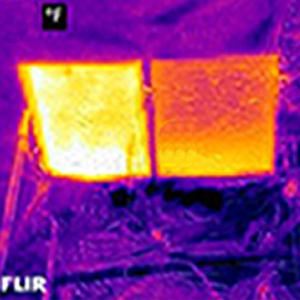
RADIANTGUARD OUTPERFORMS REFLECTIVE PAINTS
- RadiantGUARD radiant barrer (purple area),
- bare roof decking (left orange square)
- reflective paint (right orange-red square)
As seen, the best reflective paint product doesn't come close to the heat blocking benefit that RadiantGUARD provides. In fact, the reflective paint is barely better than the bare roof decking with out it.
RadiantGUARD Xtreme BLOCKs 95% of the radiant heat that enters an attic space. Protect your energy costs with RadiantGUARD.
| SKU: | B0F6VX6SKB |
| Dimensions: | 52"L x 6"W |
| Brand: | RadiantGUARD |
| Model: | RG-X |
| Manufacture: | RadiantGUARD |
Product description

RADIANTGUARD OUTPERFORMS REFLECTIVE PAINTS
- RadiantGUARD radiant barrer (purple area),
- bare roof decking (left orange square)
- reflective paint (right orange-red square)
As seen, the best reflective paint product doesn't come close to the heat blocking benefit that RadiantGUARD provides. In fact, the reflective paint is barely better than the bare roof decking with out it.
RadiantGUARD Xtreme BLOCKs 95% of the radiant heat that enters an attic space. Protect your energy costs with RadiantGUARD.
Fantastic product! I was not sure this would really do anything and decided to try it for the reasonable cost. First: The installation was easy and can be done by one person, but two people makes it go faster. The material is extremely durable and pulled taught while stapling without concerns. I had remove a few small sections I had already stapled and I simply pulled off the material close to the staple without it ripping…now that is durable!! As I was installing the section near the top of the roof, I reach my hand above the material there was a significant difference in the temperature. It was about 85 degrees outside. After installing, we had a string of 95 degree, high humidity days in the Northeast – my second floor is even cooler than it had been in the past!!! I think this will pay for itself in one season. Incredible product – just bought more to do my son’s homes. For the installation, I recommend you use scissors to cut the material. A utility knife works fine, but you have more control with the scissors. Also, get some foil HVAC tape to join any longer section that are not fastened for an even sturdier installation.
Added this to my attic to hopefully keep my furnace from freezing up on extreme heat days and to save money on ac bills. It’s thick, durable and more easily installed with a helper. It lowered the temp by 10 degrees measured with laser pointer type of device on barrier covered sections vs none. It was hard to install in some areas due to my furnace being in the way, no real floor in most sections and I did it alone.
This stuff really works! I was surprised on how much heat this blocked. On my west facing roof in the afternoon, the attic side roof was 140 F and this material was 108. North side was 125F roof and 108F material. Meaning the ambient temp of the attic was 108. Also, this material is very durable. It can be quite awkward placing it in the tight spaces of the attic, but its durability limits the chances of tears. However, I would like it to be ~50″ in width. Sometimes the rafters are not exactly 16″ apart and its tough to get 4 rafters in there. A competitor makes a 51″ version of this
Remember that guy in Phoenix that died in someone’s attic doing HVAC during the summer when it was one hundred and a billion degrees out? I was almost that guy.
So I’m up in the attic, doing HVAC for the new addition on the house. Pretty straightforward stuff, and it’s Phoenix. IT’S. ALWAYS. HOT. So attic heat – no problem. Well, in my infinite wisdom I purchased this product ahead of time. I’m going up there anyway, I might as well install some reflecto-barrier while I’m at it. Now – if you’re going to be working in the attic, it’s wise to lay down some boards to work on, instead of laying in fiberglass insulation. Let me tell you how much fun it is to go up there, sweat like a madman, have all your pores WIDE OPEN, and roll about in fiberglass. The itch is real people. So I figure – why not double my reflective capacity and put down the plywood with the reflective barrier already on it! Genius right?
So there I am, up in the attic, 118 degrees outside, literally no airflow. I’ve got the radiant roof pouring heat in from outside. I’ve got plywood with reflecto-space-blanket coating underneath me. Might as well be a solar oven up there. I dropped 10lbs of water weight. I might have even seen Jesus. Somewhere in there just shy of dying from heat exposure I realize I’ve got this amazing shiny stuff that I need to staple to the rafters. I cut a slice, even the barrier from just sitting there is about 140-billion degrees. I’m feeling fortunate for my gloves… incredibly stupid for doing this in the summer… and not sure if I’m dead or alive…
*whack* first staple in. *whack* next one in. Slowly but surely, maintaining professional levels of alignment, equal spacing on the staples, and having a great conversation with the rainbow unicorn kitty (who knew they could talk?) I got the first piece in place. What a relief. The kitty thinks it’s sparkly, and it looks like a disco. We need some better music. But we decide to put up more, to really complete the theme. Then when everyone else shows up it will be a real party.
Next piece of barrier cut. *whack*whack*whack* staples going in. Let me tell you, when this stuff touches your skin – it’s like the fire of a thousand suns. All that reflective power must concentrate the reflected energy into one tiny little spot. It even sizzles a little bit. *whack*whack*whack* a few more staples in, and the second barrier is up. Look kitty – it looks like a spaceship! Bet the guys on the moon didn’t have it this good.
I slide underneath the area with the reflective barrier and I swear the temperature dropped 15 degrees. NO JOKE. Lying there was like heaven, if heaven was 120 degrees, dark, and itchy. Kitty says the party is canceled… but I can’t find kitty anymore. Oh well, real friends are hard to come by, and rainbow unicorn kitties are too needy anyway. I happen to like this music anyway.
All jokes aside, you could literally feel the temperature change between the area with the barrier and the area without. It is not fun to put up, Imagine working with a 4-foot wide piece of silver saran wrap – without all the stretch. If you get it lined up just right, you can get it installed amazingly tight and it’s quite impressive. I used 1/2″ staples, and they held amazingly well, even with all the tugging and fussing I was doing to get it in place. If I didn’t get it just right, the stuff doesn’t tear easily, but with a little effort I could rip it off of the staples and reposition. The material seems to be tear resistant, so rips won’t continue if you do mess up and have to pull a staple or two through.
Great product, would definitely buy again, once I use up this roll.
I redid my own roof, first thing I put down was this foil roll 4′ x 250’= 10 squares, then tiger paw underlayment. The foil roll is so strong you cannot rip it, I stapled it to the plywood and could walk on it 5/12. Now my attic only gets 10 degrees warmer than the outside air….. I used 2,300 sq ft of this stuff. Very happy with the outcome. I put ghome smart temperature sensors in the attic, house and outside so i could “see” what was going on at any time on my phones app. temp/humidity sensors here> https://www.amazon.com/dp/B0B5GXJRSR
If I was using it on new construction and there were 2 or 3 of us doing the job I wouldn’t say this. I work alone on existing construction on the under side of the top cord of a truss roof. The width isn’t enough I had to add duct tape because it’s almost impossible to go lengthwise working alone so it’s much easier cover 2 truss bays at a time and it’s very difficult with only 3/4″ on each side when using a manual staplegun. So, I had to add duct tape to each side so it will be easy to staple in place especially since the trusses aren’t straight Nor are they in the same centered position to each other. I haven’t finished installing and I won’t know until summer since my roof shingles are between 150 and 175 degrees. It depends if the sun is in direct alignment with each side of the roof. I’m also hoping it will help to cool the attic airspace which is 125 degrees in summer. Summer here is April – October. I do like the fact that it’s all metal. The product that was used previously is like metallic painted paper plus it was just laid on top of the attic insulation.